Introduction
Frozen Yogurt Peanut Butter Cups are the perfect balance of indulgence and health. These delightful treats combine the creamy richness of peanut butter with the probiotic benefits of Greek yogurt, creating a snack that feels indulgent without the guilt. As more people seek healthier dessert options, this recipe has gained popularity for its ability to satisfy sweet cravings while providing nutritional benefits.
The appeal of Frozen Yogurt Peanut Butter Cups lies not only in their taste but also in their versatility. You can customize these treats to suit your preferences, whether you want to add a sprinkle of cinnamon, swap out the sweeteners, or even include different flavors of yogurt. This adaptability means that you can create a unique treat every time while still enjoying the same foundational recipe.
Using high-quality ingredients is crucial for achieving the best flavor and texture in your Frozen Yogurt Peanut Butter Cups. The right peanut butter, yogurt, and sweetener can elevate these simple treats into something truly special. Let’s dive into the ingredients and preparation steps to create your own delicious batch of Frozen Yogurt Peanut Butter Cups.
Understanding the Ingredients
Creamy Peanut Butter
At the heart of this recipe is creamy peanut butter, which provides both flavor and health benefits. Peanut butter is an excellent source of protein, healthy fats, and various vitamins and minerals, including vitamin E, magnesium, and potassium. When selecting peanut butter, opt for natural varieties that contain minimal added sugars and oils. This choice not only enhances the health profile of your treat but also ensures a more authentic peanut flavor.
Greek Yogurt
Next up is Greek yogurt, the star ingredient that adds creaminess and tang to our cups. Greek yogurt is known for its high protein content and lower sugar levels compared to regular yogurt. It also contains probiotics, which are beneficial for gut health. You can choose plain Greek yogurt for a neutral flavor or flavored varieties for a twist. Just be cautious with flavored options, as they often contain added sugars.
Sweeteners: Honey vs. Maple Syrup
Sweeteners play a crucial role in balancing the flavors of your Frozen Yogurt Peanut Butter Cups. Honey and maple syrup are both popular choices, each bringing its unique characteristics to the recipe. Honey is sweeter and has a distinct flavor that pairs well with peanut butter and yogurt. On the other hand, maple syrup adds a rich, earthy sweetness that can complement the overall taste. When selecting a sweetener, consider your dietary preferences and the flavor profile you wish to achieve.
Pure Vanilla Extract
Vanilla extract is a key player in enhancing the overall flavor of your dessert. Its warm, sweet notes harmonize beautifully with the peanut butter and yogurt, making your treats taste more indulgent. Always opt for pure vanilla extract over imitation vanilla for the best flavor. A little goes a long way, so just a teaspoon will suffice for this recipe.
Sea Salt
Adding a pinch of sea salt is essential for balancing sweetness and enhancing the overall flavor of your Frozen Yogurt Peanut Butter Cups. Salt accentuates the richness of the peanut butter and the creaminess of the yogurt, making each bite more satisfying. This simple ingredient can transform your treats from good to spectacular.
Dark Chocolate Chips
For those looking to indulge a little more, dark chocolate chips are an optional yet delightful addition. They not only provide a burst of chocolate flavor but also come with health benefits, including antioxidants and lower sugar content compared to milk chocolate. If you choose to include them, opt for high-quality dark chocolate with a cacao content of at least 60% for the best results.
Mini Cupcake Liners
Lastly, mini cupcake liners are essential for convenience and presentation. These small liners allow you to create perfectly portioned cups that are easy to remove and serve. They also add a fun visual element to your treats. When selecting liners, consider using silicone or parchment paper liners for easy release and a more eco-friendly option.
Preparation Steps Explained
Preparing the Cupcake Liners
Before you start mixing your ingredients, you’ll need to prepare your mini muffin tins with cupcake liners. Using mini muffin tins is crucial for achieving the right size for your Frozen Yogurt Peanut Butter Cups. These bite-sized treats are perfect for snacking and sharing.
To ensure easy removal, line each cup with a mini cupcake liner, pressing it firmly into the tin. If you’re using paper liners, consider lightly spraying them with a non-stick cooking spray to facilitate easier removal after freezing. This step will save you frustration later and maintain the integrity of your cups.
Making the Peanut Butter Layer
Once your cupcake liners are prepared, it’s time to create the peanut butter layer. In a mixing bowl, combine your creamy peanut butter with a touch of honey or maple syrup, a splash of vanilla extract, and a pinch of sea salt. Using a hand mixer or a whisk, blend the ingredients until you achieve a smooth and creamy consistency.
For those who want to experiment with flavors, consider adding a dash of cinnamon or even a bit of cocoa powder for a chocolatey twist. The key here is to ensure the mixture is smooth and well-combined, so every bite is evenly flavored.
Filling the Liners
Now that your peanut butter mixture is ready, it’s time to fill the cupcake liners. Using a tablespoon or a small cookie scoop, portion out the peanut butter mixture into each liner. Aim for uniformity to ensure even freezing and serving sizes. Smooth the surface of each filled liner with the back of a spoon for an appealing look. This step is important not only for aesthetics but also for making the transition to the yogurt layer seamless.
Adding the Yogurt Layer
Next, prepare the yogurt layer. In another bowl, mix your Greek yogurt with a sweetener of choice and a dash of vanilla extract. Blend until smooth, ensuring there are no lumps. If you want to add variations to this layer, consider using flavored yogurt or stirring in fruit puree for a fruity twist.
Carefully spoon the yogurt mixture over the peanut butter layer in each cupcake liner, filling them to the top. Again, smooth the surface for a polished finish. This layering creates a beautiful contrast and ensures that each cup has a perfect blend of flavors.
Freezing the Cups
Once your cups are filled with both the peanut butter and yogurt layers, it’s time to freeze them. Place the muffin tin in the freezer for at least 2-3 hours or until the cups are fully solid. For best results, cover the muffin tin with plastic wrap or a lid to prevent any freezer odors from affecting the flavor of your treats.
Once frozen, you can pop them out of the liners and store them in an airtight container in the freezer. These Frozen Yogurt Peanut Butter Cups will keep well for several weeks, making them a convenient and healthy snack option for those sweet cravings.
Stay tuned for the next part of this article, where we will explore tips for achieving the best results and answer common questions related to this delicious treat.
{{image_2}}
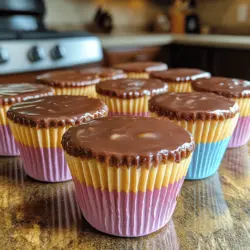
Freezing Process for Frozen Yogurt Peanut Butter Cups
Once you’ve filled your cupcake liners with the yogurt and peanut butter mixture, it’s time to freeze them. The freezing process is crucial as it transforms your creamy mixture into a firm, delightful treat. When freezing, it’s essential to allow adequate time for the cups to solidify completely; this usually takes about 3 to 4 hours, but for best results, consider leaving them overnight. This ensures that the cups maintain their shape and texture when you bite into them.
Preparing the Chocolate Coating (Optional)
While the yogurt peanut butter mixture is freezing, you can prepare the chocolate coating. This step is optional, but it adds a delicious layer of flavor and provides a satisfying crunch. Melting chocolate can be done in several ways, with the most popular methods being the microwave and the double boiler technique.
Techniques for Melting Chocolate
1. Microwave Method:
– Chop your chocolate into small, even pieces for uniform melting. Place the chocolate in a microwave-safe bowl.
– Heat the chocolate in 30-second intervals, stirring between each interval until it’s fully melted. Be cautious not to overheat, as chocolate can seize up quickly.
2. Double Boiler Method:
– Fill a pot with a few inches of water and bring it to a simmer. Place a heatproof bowl over the pot, ensuring it doesn’t touch the water.
– Add the chocolate to the bowl and stir occasionally until melted. This method allows for more controlled melting and is less likely to scorch the chocolate.
Alternatives to Dark Chocolate for Coating
If dark chocolate isn’t your preference, consider these alternatives for coating your Frozen Yogurt Peanut Butter Cups:
– Milk Chocolate: Offers a sweeter taste, perfect for those who enjoy a less intense chocolate flavor.
– White Chocolate: Provides a creamy sweetness and pairs well with the peanut butter flavor.
– Carob Chips: A great option for those avoiding chocolate altogether, carob has a unique taste and is caffeine-free.
Coating the Cups
Once your yogurt peanut butter cups are frozen solid, it’s time to coat them in chocolate. This step can be done in two ways: dipping or drizzling.
Step-by-Step on Dipping vs. Drizzling Chocolate
1. Dipping:
– Remove the yogurt cups from the liners. You can use a fork or a toothpick to help lift them out.
– Dip each cup into the melted chocolate, allowing any excess to drip off. Place them on a parchment-lined baking sheet.
– For a thicker chocolate layer, let the first coat set for a few minutes before dipping again.
2. Drizzling:
– For a decorative touch, use a spoon or a piping bag filled with melted chocolate to drizzle over the frozen cups. This method is less messy and still provides a delightful chocolate flavor.
Importance of Returning to the Freezer for Setting
After coating, return the cups to the freezer for about 30 minutes to allow the chocolate to set completely. This step is crucial, as it ensures that the chocolate hardens and adheres well to the yogurt base, creating a seamless treat.
Serving Suggestions and Storage Tips
Now that your Frozen Yogurt Peanut Butter Cups are ready, let’s explore the best ways to serve and store them for maximum enjoyment.
Best Ways to Serve Frozen Yogurt Peanut Butter Cups
These cups are perfect as a standalone treat, but you can elevate their presentation for parties or gatherings. Consider serving them on a decorative platter or in cupcake liners for an attractive display.
Presentation Ideas for Parties or Gatherings
– Tiered Dessert Stand: Arrange the cups on a tiered stand for an elegant look.
– Chocolate Drizzle Garnish: Add an extra drizzle of chocolate on top for a gourmet touch.
– Fresh Fruit: Serve alongside fresh berries or banana slices for a refreshing complement.
Pairing Suggestions
Frozen Yogurt Peanut Butter Cups pair beautifully with various foods and beverages:
– Fruits: Serve with sliced strawberries or apple wedges for a delicious contrast.
– Coffee: A cup of coffee or espresso enhances the flavor, making it an ideal after-dinner treat.
Proper Storage Methods
To keep your Frozen Yogurt Peanut Butter Cups fresh, follow these storage tips:
– Freezer Storage: Place the cups in an airtight container or freezer bag, ensuring they are separated by parchment paper to prevent sticking.
– Keeping Them Fresh: Properly stored, these treats can last up to 2 months in the freezer without losing their flavor or texture.
Duration for Optimal Taste and Texture
For the best taste and texture, consume your Frozen Yogurt Peanut Butter Cups within the first month of freezing. After that, while they will still be safe to eat, the quality may diminish.
Health Benefits of Frozen Yogurt Peanut Butter Cups
Not only are these cups delicious, but they also offer several health benefits due to their wholesome ingredients.
Nutritional Analysis of the Ingredients
– Greek Yogurt: High in protein and probiotics, Greek yogurt supports digestive health and provides a creamy texture.
– Peanut Butter: A source of healthy fats and protein, peanut butter adds richness and satiety, making these cups feel indulgent yet nutritious.
Protein Content from Greek Yogurt
One serving of Greek yogurt can provide up to 10 grams of protein, which is essential for muscle repair and overall health, making these treats a great post-workout snack.
Healthy Fats from Peanut Butter
The monounsaturated fats found in peanut butter can help lower bad cholesterol levels, making it a heart-healthy option when consumed in moderation.
Benefits of Moderate Sugar Intake with Honey or Maple Syrup
Using natural sweeteners like honey or maple syrup not only adds flavor but also offers antioxidants and nutrients that refined sugars lack.
Exploring Dietary Preferences
These Frozen Yogurt Peanut Butter Cups are versatile and can cater to various dietary preferences:
– Gluten-Free: Made with simple, gluten-free ingredients, they are safe for those with gluten intolerances.
– Vegetarian: With no meat or fish products, this recipe is suitable for vegetarians.
Customizing for Vegan Diets
To make these cups vegan-friendly, substitute Greek yogurt with a plant-based yogurt alternative and use maple syrup instead of honey. This ensures that everyone can enjoy this delicious treat.
Conclusion
In conclusion, Frozen Yogurt Peanut Butter Cups are not only an appealing dessert option but also an easy and healthy treat that you can make at home. With rich flavors and creamy textures, they serve as a delightful alternative to traditional candies. Whether you choose to experiment with various fillings or chocolate coatings, the possibilities are endless.
Feel free to explore different flavor combinations and enjoy this treat as a healthier dessert option. The satisfaction that comes from homemade treats is unparalleled, reinforcing the idea that indulgence doesn’t have to compromise health. Enjoy your Frozen Yogurt Peanut Butter Cups as a delicious part of a balanced diet, and relish in the joy of creating delightful snacks that everyone can appreciate.