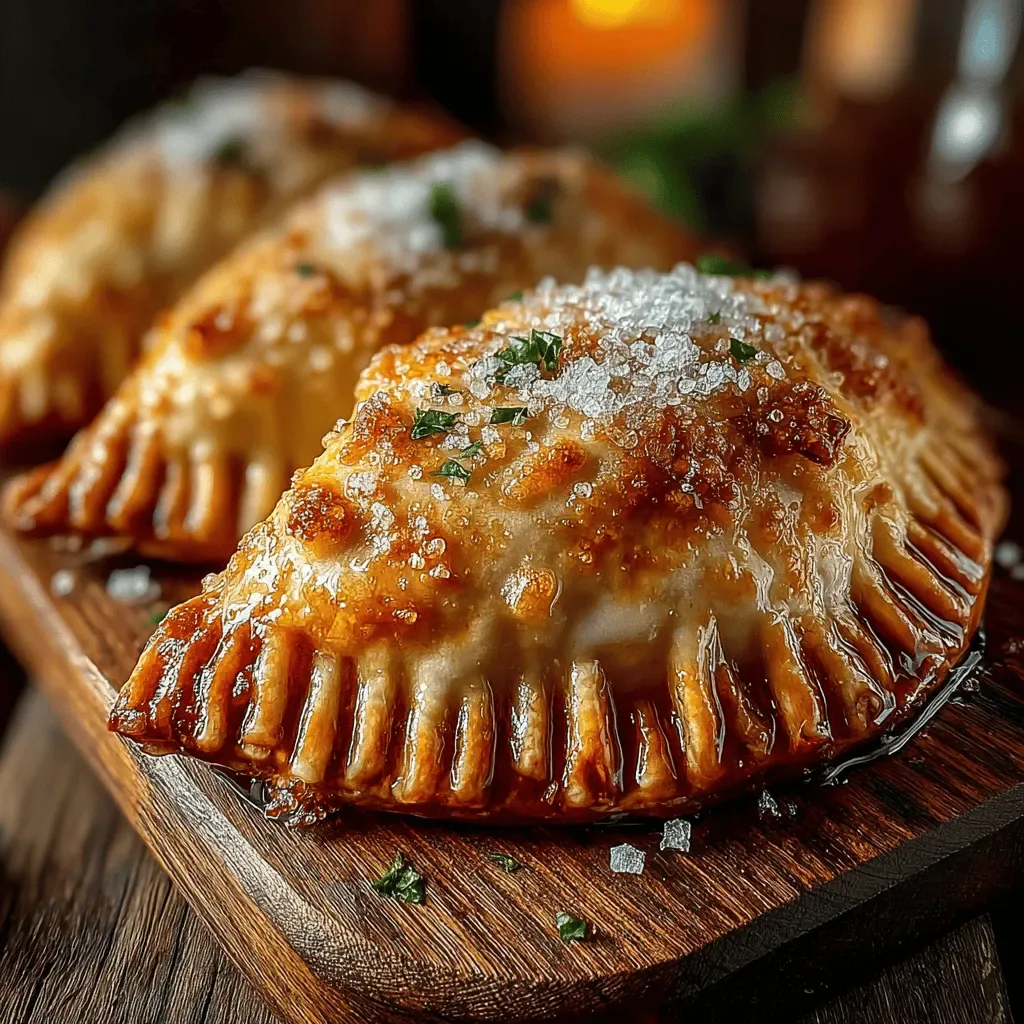
Imagine the aroma of sweet apples mingling with warm cinnamon drifting from a golden‑brown pastry— that’s the magic of Crispy Apple Cinnamon Hand Pies. They’re bite‑size, handheld, and perfect for any occasion where comfort meets elegance.
What sets this recipe apart is the buttery, flaky crust that stays crisp even after baking, paired with a luscious apple‑cinnamon filling that’s lightly sweetened and spiced just right. A quick brush of caramelized butter gives each bite a glossy, irresistible finish.
Kids love the handheld fun, coffee lovers enjoy them as a sweet‑savory snack, and holiday hosts can serve them as a charming dessert. They shine at brunch tables, after‑school treats, or as a cozy night‑in indulgence.
The process is straightforward: roll out a simple dough, spoon in a fragrant apple mixture, fold, seal, and bake until the edges puff up and turn a beautiful amber hue. In under an hour you’ll have a tray of perfectly crisp pies ready to share.
Why You'll Love This Recipe
Golden, Flaky Crust: The butter‑rich dough creates layers that puff up in the oven, delivering that coveted crunch while staying tender inside.
Balanced Sweetness: A modest amount of brown sugar and honey lets the natural apple flavor shine without becoming cloyingly sweet.
Hand‑Friendly Design: Individual portions mean no cutting or plating—perfect for on‑the‑go snacking or effortless serving at gatherings.
Customizable Spice: Adjust cinnamon, nutmeg, or a pinch of cardamom to match your palate, making each batch uniquely yours.
 Ingredients
The foundation of these hand pies is a simple yet buttery dough that requires only flour, cold butter, a splash of milk, and a pinch of salt. For the filling, crisp apples are tossed with warm spices, a touch of sweetener, and a splash of lemon juice to keep the fruit bright. A quick glaze of melted butter and brown sugar adds shine and extra crunch right before they finish baking.
Dough
- 2 ½ cups all‑purpose flour
- 1 cup (2 sticks) unsalted butter, cold and cubed
- ¼ cup ice‑cold whole milk
- ½ teaspoon salt
Apple Filling
- 3 large apples (Granny Smith or Honeycrisp), peeled, cored, and diced
- ¼ cup light brown sugar, packed
- 2 tablespoons honey
- 1 ½ teaspoons ground cinnamon
- ¼ teaspoon ground nutmeg
- 1 tablespoon fresh lemon juice
Glaze & Finishing
- 2 tablespoons unsalted butter, melted
- 1 tablespoon light brown sugar
The cold butter in the dough creates steam pockets that lift the pastry, while the milk adds just enough moisture to bind the flour without making the crust tough. Apples bring natural sweetness and a slight tartness that balances the brown sugar, and the lemon juice prevents oxidation, keeping the filling bright. The final butter‑brown‑sugar glaze caramelizes during baking, giving each hand pie a glossy, crackly top that’s impossible to resist.
Step-by-Step Instructions
Making the Dough
In a large bowl combine the flour and salt. Toss the cold butter cubes in, using a pastry cutter or two forks, until the mixture resembles coarse crumbs with pea‑size butter pieces. Drizzle the ice‑cold milk over the crumbs and stir gently until the dough just comes together. Form into a disk, wrap in plastic, and chill for at least 20 minutes; this relaxes gluten and keeps the butter solid for a flaky texture.
Preparing the Apple Filling
While the dough chills, place the diced apples in a saucepan with brown sugar, honey, cinnamon, nutmeg, and lemon juice. Cook over medium heat, stirring occasionally, until the apples soften but retain a slight bite—about 6‑8 minutes. The mixture should be glossy and fragrant; remove from heat and let it cool slightly before filling the pies.
Assembling the Hand Pies
- Roll the Dough. On a lightly floured surface, roll the chilled dough to about ⅛‑inch thickness. Using a 4‑inch round cutter, press out circles and gather the scraps for a second batch.
- Fill Each Circle. Place a heaping tablespoon of the warm apple mixture in the center of each dough round. Be sure not to over‑fill; a small rim of dough should remain visible.
- Seal the Edges. Fold the circle over to form a half‑moon, then press the edges together with a fork, creating a decorative seal. This step traps steam, ensuring a crisp, sealed pocket.
- Brush with Glaze. Mix melted butter with brown sugar and brush the tops of each pie generously. The sugar will caramelize, giving a beautiful sheen and extra crunch.
- Bake to Perfection. Arrange pies on a parchment‑lined baking sheet and bake in a preheated 400°F (200°C) oven for 20‑22 minutes, or until the crust is deep golden and the glaze is bubbling. Rotate the sheet halfway through for even browning.
Finishing Touches
Allow the hand pies to cool on a wire rack for 5 minutes; this lets the filling set slightly, preventing spills when you bite in. Dust with a light sprinkle of powdered sugar if desired, then serve warm. The contrast between the buttery crust and the spiced apple center is at its peak when fresh from the oven.
Tips & Tricks
Perfecting the Recipe
Keep Everything Cold. Cold butter and milk prevent the dough from becoming greasy and ensure the layers puff up beautifully during baking.
Don’t Over‑mix. Mix just until a cohesive dough forms; over‑working develops gluten, which can make the crust tough instead of flaky.
Use a Light Hand with Filling. Too much apple mixture can cause leaks; a tablespoon per pie is ideal for a tidy seal.
Brush Before Baking. Applying the butter‑sugar glaze before the oven creates a caramelized top; a second brush halfway through adds extra shine.
Flavor Enhancements
Add a splash of vanilla extract to the apple mixture for a deeper aromatic note, or stir in a handful of toasted chopped walnuts for crunch. A pinch of ground cardamom elevates the spice profile, giving the pies an exotic twist without overpowering the classic cinnamon flavor.
Common Mistakes to Avoid
Resist the urge to roll the dough too thin; a thickness under ⅛‑inch can lead to tearing. Also, avoid using overly ripe apples—they release excess liquid, making the crust soggy. Pat the cooked apples dry before filling if they seem too juicy.
Pro Tips
Chill the Filled Pies. After assembling, place the pies on the sheet pan in the fridge for 10 minutes before baking; this firms the butter, leading to an even rise.
Use a Fork for Sealing. Pressing the edges with a fork not only secures the pie but also creates a decorative pattern that looks professional.
Check for Doneness. The crust should be a deep golden brown and feel firm to the touch; a light tap should produce a hollow sound.
Serve Warm. Warm pies have a softer interior and a crispier crust; reheat briefly if they’ve cooled for the best texture.
Variations
Ingredient Swaps
Swap Granny Smith apples for pears or tart quince for a subtle flavor shift. Replace butter in the dough with half‑and‑half for a richer crumb, or use coconut oil for a dairy‑free alternative. For a caramel twist, drizzle a spoonful of dulce de leche over the filling before sealing.
Dietary Adjustments
Use a gluten‑free flour blend (ensure it contains xanthan gum) to keep the crust tender. Substitute honey with maple syrup for a vegan version, and choose a plant‑based butter for the glaze. For a lower‑sugar option, reduce brown sugar to 2 tablespoons and add a dash of erythritol.
Serving Suggestions
Serve the pies alongside a scoop of vanilla bean ice cream or a dollop of lightly sweetened Greek yogurt. A drizzle of caramel sauce adds extra decadence. For a brunch spread, pair them with a hot cup of spiced chai or freshly brewed coffee.
Storage Info
Leftover Storage
Allow any leftover pies to cool completely, then place them in an airtight container or a zip‑top bag. Store in the refrigerator for up to 4 days. For longer keeping, freeze individual pies on a parchment sheet, then transfer to a freezer‑safe bag; they’ll maintain quality for up to 3 months.
Reheating Instructions
Reheat frozen or refrigerated pies in a preheated 350°F (175°C) oven for 10‑12 minutes, uncovered, until the crust regains its crispness. For a quicker option, microwave a single pie on medium power for 45‑60 seconds, then finish under a broiler for 2 minutes to restore crunch.
Frequently Asked Questions
These Crispy Apple Cinnamon Hand Pies deliver a perfect blend of buttery flakiness and warm, spiced fruit in every bite. By following the detailed steps, storage tips, and optional variations, you’ll master a treat that feels both nostalgic and sophisticated. Feel free to experiment with different spices or gluten‑free flours—cooking is your canvas. Serve them warm, share them generously, and enjoy the comforting aroma that fills your kitchen.