Cheesy Bites of Bliss: Mini Grilled Cheese Nacho Sliders
Introduction
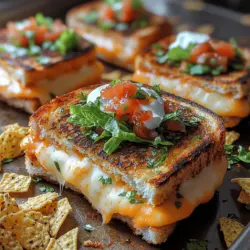
If you’re on the lookout for a snack that combines comfort food with a touch of creativity, then look no further than Cheesy Bites of Bliss: Mini Grilled Cheese Nacho Sliders. This delightful recipe marries the classic flavors of a grilled cheese sandwich with the vibrant and zesty elements of nachos, resulting in a dish that is not only satisfying but also bursting with flavor. Whether you’re hosting a casual gathering, looking for a fun appetizer, or simply want to indulge in a unique treat, these sliders will surely elevate your culinary experience.
One of the standout features of this recipe is its versatility. With a range of ingredients that can be easily swapped or adapted, you can customize your sliders to suit your taste preferences or dietary needs. From different types of bread to an array of cheeses and toppings, the possibilities are endless. The result is a crunchy, cheesy, and utterly delicious bite-sized snack that promises to be a hit with family and friends alike. As you take your first bite, expect a satisfying crunch followed by the gooey melt of cheese, punctuated with the savory kick of taco seasoning and the freshness of diced tomatoes and jalapeños.
Understanding the Ingredients
To create these delectable Cheesy Bites of Bliss, it’s essential to understand the role each ingredient plays in enhancing the overall flavor and texture of the dish. Let’s dive into the main components that make up these sliders.
Bread Options: The choice of bread significantly influences the flavor and texture of your sliders. While traditional white bread is a popular choice for its soft, fluffy texture, opting for whole wheat can add a nutty flavor and extra fiber. For those who enjoy a more robust taste, sourdough offers a tangy profile and a delightful chewiness. Each type of bread brings its unique character to the sliders, so consider experimenting to find your personal favorite.
Cheese Selection: The star of any grilled cheese is undeniably the cheese itself. For this recipe, sharp cheddar and pepper jack are recommended for their excellent melting qualities and flavor profiles. Sharp cheddar brings a rich, tangy flavor, while pepper jack adds a spicy kick that elevates the sliders to new heights. Together, they create a creamy, gooey filling that is simply irresistible.
Crunch Factor: One of the defining elements of these sliders is the addition of crushed tortilla chips. These chips provide a satisfying crunch that contrasts beautifully with the melty cheese and soft bread. Not only do they enhance the texture, but they also contribute a corn flavor that ties in perfectly with the nacho theme.
Flavor Enhancers: To ensure that each bite is packed with flavor, we recommend incorporating taco seasoning, diced tomatoes, and jalapeños into the filling. Taco seasoning adds a warm, savory spice that is reminiscent of classic nacho flavors, while diced tomatoes provide moisture and freshness. For those who enjoy a bit of heat, jalapeños bring just the right amount of spice, creating a balanced flavor profile.
Serving Elements: No slider is complete without the perfect dipping sauce. Sour cream and salsa serve as ideal accompaniments, adding creaminess and tang, as well as a burst of flavor. These elements not only enhance the experience but also allow guests to personalize their sliders, making each bite even more enjoyable.
Preparation Steps
Now that we’ve covered the essential ingredients, it’s time to delve into the preparation process. Following these steps will help you create the perfect Cheesy Bites of Bliss that are sure to impress.
1. Prepping the Grill Pan or Skillet: Start by preparing your grill pan or skillet. It’s crucial to heat it to medium-low for optimal toasting. This allows the bread to become golden brown without burning, ensuring that the cheese melts perfectly. If the heat is too high, the exterior may char before the cheese has a chance to melt.
2. Buttering the Bread: Next, take your chosen bread and spread a generous layer of butter on one side of each slice. Butter is key to achieving a rich flavor and a beautifully crisp texture. It creates a golden crust that seals in the melted cheese and keeps the sliders from sticking to the pan.
3. Assembling the Sandwiches: Once your bread is buttered, it’s time to assemble the sandwiches. Start with a slice of bread, butter side down, and layer on a generous amount of sharp cheddar cheese, followed by pepper jack cheese. Add a sprinkle of taco seasoning, a few diced tomatoes, and jalapeños as desired. Top it off with another slice of bread, butter side up. This layering technique ensures that each bite is balanced with cheese, flavor, and a satisfying crunch.
4. Grilling Techniques: When it comes to grilling your sliders, patience is key. Place the assembled sandwiches on the heated grill pan or skillet and cook for about 3-4 minutes on one side, or until golden brown. Carefully flip the sandwiches using a spatula, and grill the other side for an additional 3-4 minutes. Keep an eye on them to avoid burning, and adjust the heat as necessary. The goal is to achieve a beautifully browned exterior while ensuring that the cheese melts thoroughly.
By following these initial steps, you’ll be well on your way to creating Cheesy Bites of Bliss that are sure to be the highlight of any gathering. With their delicious fusion of flavors and textures, these mini grilled cheese nacho sliders are destined to become a favorite in your culinary repertoire.
{{image_2}}
Creating the Perfect Slider
Now that you’ve prepared your delicious Cheesy Bites of Bliss, it’s time to focus on creating the perfect slider. The way you cut and present these sliders can elevate your dish from merely good to visually stunning and appetizing.
Techniques for Cutting and Presenting the Sliders
To maintain the structural integrity of your sliders, it’s crucial to allow them to cool slightly after baking, ideally for about 5-10 minutes. This brief cooling period helps the cheese set slightly, making it easier to cut and preventing the sliders from falling apart.
When cutting your sliders, use a sharp serrated knife. This knife helps you slice through the bread without squishing the soft layers of cheese and filling. Cut the sliders into squares or rectangles that are easy to handle—about 2 inches in width works well for bite-sized portions.
Importance of Allowing the Sandwiches to Cool Slightly
Allowing your cheesy sliders to cool is not just about avoiding a mess; it’s also about enhancing flavor and texture. When hot, sliders can be gooey and difficult to manage. A brief cooling period allows the cheese to firm up, making each bite a delightful combination of crunchy bread and creamy filling rather than a melty mess.
Suggestions for Arranging Sliders on a Platter
Once cut, the presentation of your sliders plays a pivotal role in how they are perceived. Arrange them neatly on a platter, standing upright for an attractive display, or lay them flat in a single layer. Space them out to show off the layers and colors of the ingredients. You can also use decorative toothpicks to hold them together, adding a stylish touch that makes them easy for guests to grab and enjoy.
Discussing Garnishing Options
Garnishing is essential for both flavor enhancement and visual appeal. Fresh shredded lettuce adds a pop of color and a crisp texture that contrasts beautifully with the cheesy filling. Consider incorporating a variety of sauces—such as spicy sriracha mayo, zesty ranch, or even a tangy barbecue sauce—to both elevate the flavor profile and provide a colorful drizzle over the sliders. A sprinkle of fresh herbs, like cilantro or parsley, can also add a burst of freshness and enhance the overall presentation.
Flavor Profile and Variations
The flavor profile of your Cheesy Bites of Bliss sliders is a delightful medley of cheesy, spicy, and crunchy elements, making them a true crowd-pleaser.
Analyzing the Flavor Profile of the Sliders
The base of the slider is the gooey, rich cheese that creates an irresistible melting sensation. Adding spices introduces warmth and complexity, while the crispy edges provide a satisfying crunch. This balance of textures and flavors is what makes these sliders so addictive.
Exploring Variations
Alternative Cheeses for Different Taste Preferences
While the original recipe shines with classic cheeses, experimenting with different varieties can tailor the dish to your taste. For instance, swapping the cheddar for pepper jack will add a spicy kick, while a creamy brie could lend a luxurious twist. Goat cheese brings tanginess, and smoked gouda infuses a wonderful depth of flavor.
Additional Toppings
Customization is key to making these sliders your own. Consider adding sliced avocados for creaminess, diced onions for a sharp bite, or colorful peppers for a sweet crunch. Each topping not only enhances the flavor but also adds visual interest, making your sliders even more appealing.
Adjusting Spice Levels
Not everyone has the same tolerance for heat, so it’s essential to adjust the spice levels based on your audience. For a milder version, consider omitting some of the spicier ingredients or using bell peppers instead of jalapeños. Conversely, if you’re catering to spice lovers, feel free to amp up the heat with habanero cheese or additional hot sauce.
Serving Suggestions
Ideal Serving Occasions
Cheesy Bites of Bliss sliders are incredibly versatile and perfect for various occasions. Whether you’re hosting a lively party, gearing up for an exciting game day, or simply enjoying a casual family dinner, these sliders are sure to impress. Their finger food nature makes them ideal for sharing, allowing guests to indulge without the need for formal table settings.
Pairing Ideas
To complement your sliders, consider pairing them with refreshing beverages such as iced tea, lemonade, or craft beers that highlight the savory notes of the dish. For sides, a fresh salad with a tangy vinaigrette, crispy fries, or even a bowl of tortilla chips with guacamole will round out the meal beautifully.
The Appeal of Serving with Additional Tortilla Chips and Dips
For an even more complete snacking experience, serve your sliders alongside extra tortilla chips and a variety of dips. Guacamole, salsa, or a creamy queso dip can enhance the flavor of the sliders while offering guests additional options to enjoy. This approach not only elevates the meal but also encourages mingling and sharing among guests.
Conclusion
In summary, the Cheesy Bites of Bliss sliders are a simple yet delightful recipe that brings comfort food to the next level. Their ease of preparation, combined with the potential for customization, makes them a fantastic choice for any culinary occasion.
These sliders are sure to become a favorite among family and friends, creating lasting memories around the dining table. Don’t hesitate to experiment with the variations suggested—this is your chance to unleash your creativity in the kitchen!
Try making these sliders today, and watch as they become the highlight of your gatherings. Whether served as a casual snack or a centerpiece for a festive occasion, they are guaranteed to please every palate. Enjoy the process and, most importantly, enjoy the delicious results!